Bread Yoga
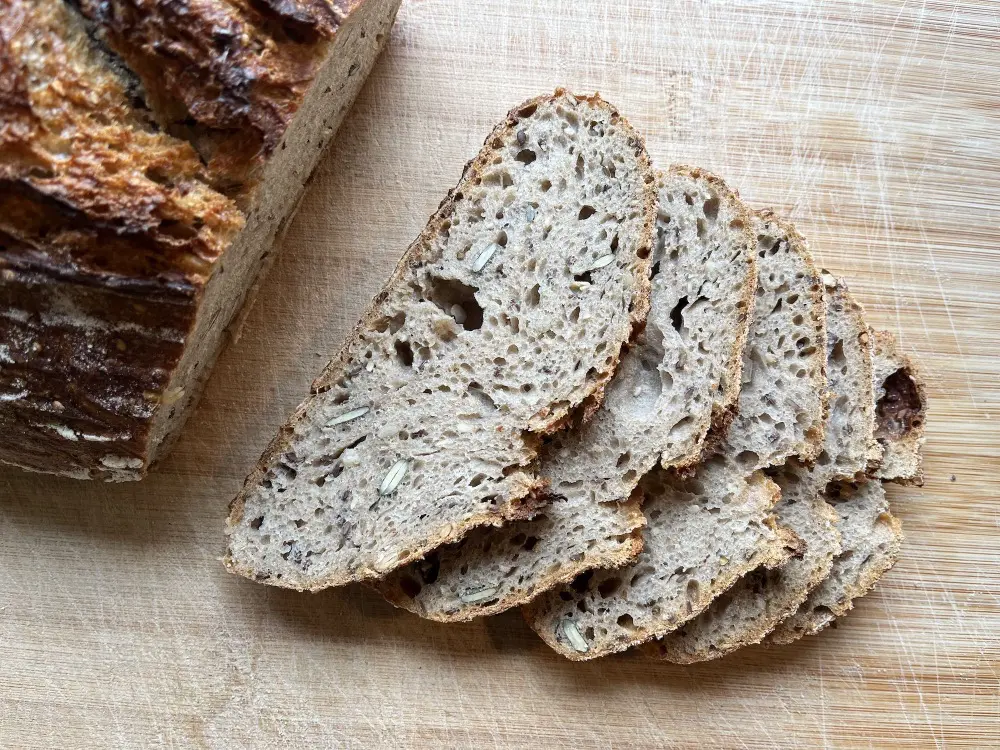
German country bread.
Posted
11 December 2022
In recent years I have made many, many loaves. Many tests with different types of flour. Pure or mixed. With yeast and since 2019 with sourdough. However, I have basically ended up making two variations: white bread (100% wheat flour) or rye bread, making a mixture of 50% wheat flour and 50% rye flour. In this article I will explain how I do the second type.
Each flour is different and behaves in a different way. They require different amounts of water, different fermentation times, etc. In addition, the water also varies a lot from one place to another since it can have a different mineral load, more or less amount of lime, etc. Finally, flours of the same type can also behave differently depending on the variety of cereal, the state of maturation or how they have been milled. For this reason, what I am going to expose here is my experience, with my water, my flours and my sourdough. It is very likely that the same ingredients used in a different place, with a different water and with a different ambient temperature and humidity will give different results than mine. Last but not least, each oven is also different and, as a tool, one must become familiar with it. My most sincere advice: test and correct, test and correct, test and correct. And most importantly: don't get discouraged.

The kneading
I didn't use a robot for kneading until 2020, the year I bought my Kitchenaid. In principle, to make white breads it is not too important since wheat flour is very elastic and not very sticky, so manual kneading is quite comfortable. However, rye flour is extremely sticky when mixed with water and I must admit that the kneading robot does this task extremely well.
For my recipe I use 300 grams of whole rye flour mixed with 300 grams of white wheat flour, I don't use whole wheat because with white flour I get a much fluffier plan, let's say it's a hybrid between German bread and Spanish bread. The mixture of 600 grams of flour is hydrated to just over 70%, that is, in my case I use 420 grams of warm water (just over 20°C is enough).
To prepare the dough, I pour the water into a bowl and then add my whole boat of sourdough (about 200 grams). I add it all with a spoon, later I'll explain why. When the sourdough falls on the water I can see if it is in shape or not: that is if it floats or if it sinks. If it sinks, it's because it's been in the fridge for a couple of days and it's starting to loosen up. The fermentation will then be a little longer, but nothing happens. If it floats, it means that the dough is very active and the fermentation will be faster, but in both cases we will obtain good results.
Then we add the two flours and we can start kneading (with the machine for about 5 minutes).
While we knead we are going to prepare the sourdough for the next time and it will also serve as an "indicator". I have commented that I pour all the sourdough with a spoon. Well, with the remains of sourdough that we have in the jar and in the spoon, there will already be enough to prepare the sourdough for the next day. That's right: in the same dirty boat and using the same spoon we add a little water (about two centimeters high) and mix "cleaning" the walls of the boat with that water. Once the remains have dissolved in the water, add white wheat flour until the mixture is saturated: make it pasty and not crumble. We could leave it a little more liquid but it would have less consistency and it would not be as "pretty". Furthermore, we could not use it as I said before as an "indicator".
We return to the kneading. I said five minutes was enough, but we're not done yet. We stop kneading and add salt. It is important that it is mixed late into the sourdough as the salt will kill too many ferments if mixed too early. How much salt? To taste: I add about nine grams of salt for 600 grams of flour. Then we add the species. For rustic German bread, in order to attenuate the sour taste of the rye, a mixture of ground spices (fennel, anise, cumin and coriander) is used. For such a bread I use two teaspoons of coffee. Finally, and this is optional, you can add a handful of seeds: I normally use pumpkin, sunflower, flax and sesame seeds. They give the bread a wonderful touch.
Once you have added the salt, the spices and optionally the seeds, knead again for another three minutes.
Once the kneading is finished, let the dough rest in the same container in which you kneaded it, leaving it in a warm place, covered with a cloth and next to it the boat with the sourdough preparation.
The first fermentation
By having the sourdough in a glass jar next to the dough, in reality we have practically the same thing in both places, that means that what happens to the sourdough will also happen to the bread dough. The fermentation of one will be the same as the other, so that since the sourdough is in a glass jar, we can perfectly observe how it evolves at all times. That is our “indicator”. Under conditions between 20 and 25°C the dough will need about six hours to ferment. But do not trust and pay attention to the sourdough. The complete fermentation of the sourdough will make it triple its size, but be careful: we do not want to ferment the bread completely. To obtain an optimal result, it is necessary to stop this first fermentation when the dough has doubled. So when the sourdough has doubled its size we will move on to the next step.
While that happens, it is advisable to aerate the mass every hour or so. To carry out this operation, it will be necessary to wet your hands and without drying them, take the bread dough (you don't have to touch the sourdough anymore) and unwrap it with the fingers of both hands: stretching it on top and folding it under. If it sticks too much to your hands, moisten them again with fresh water.
The stretched
I have commented that it is very important that the bread does not ferment completely. If this happens, the dough will be too airy and will break when stretched. Rye dough is very delicate and not at all as elastic as wheat. To stretch it we are going to do the following. We need a surface to work of approximately 50 by 50 cm. As the rye dough is extremely sticky, we are going to wet our hands and with the water from the wet hands we are going to smear the rolling surface: no flour!
Then we take the dough with wet hands (you can wet them again) and put the dough on the surface that we have moistened. You should be able to slip. Next, and very carefully, we begin to stretch the dough with our fingers from the center to the edges. Take care that with this operation the dough does not break too much since, as I have said, rye is not as elastic as wheat.
Once we have the stretched dough, we first fold it into thirds and then roll it up so that it fits well in the fermentation basket (round or elongated).
Now yes: with a cloth we carefully dry the remains of water around our dough and with abundant flour we coat the dough so that it cannot stick to us anymore, but we do not knead it anymore.


The second fermentation
Next, sprinkle abundant flour in a fermentation basket (very important if we want to give it the grated appearance of this type of bread) and carefully introduce the folded dough. Cover with a slightly damp cloth and let the dough rest in the fridge. There the bread will finish fermenting. It is recommended to leave it cold for a minimum of four hours and a maximum of 24. This is perfect if you want to plan when you want to bake the bread, since you have a few hours to spare to have it ready, for example, before dinner.

The baking
For me, this is the most critical phase and the one that has cost me the most to learn after many mistakes. Baking is 70% of the success factor of a bread. If we don't do it correctly, the crust will be dry, colorless and will prevent the bread from cracking and expanding properly. There are tons of videos and tutorials on the internet on how to do this step. Below I explain the system that works best for me.
To bake really good bread I always use a baking stone on the bottom of the oven. The typical slab for making pizzas that you can find on Amazon. With the oven empty and only the stone at its base, I preheat to 200°C with heat above and below. Sprinkle some flour to prevent the bread from sticking.
While the oven is preheating, I put water to boil and at the same time I heat an empty kitchen saucepan, with absolutely nothing. It is important that this saucepan has a metal handle since we are going to put it in the oven.
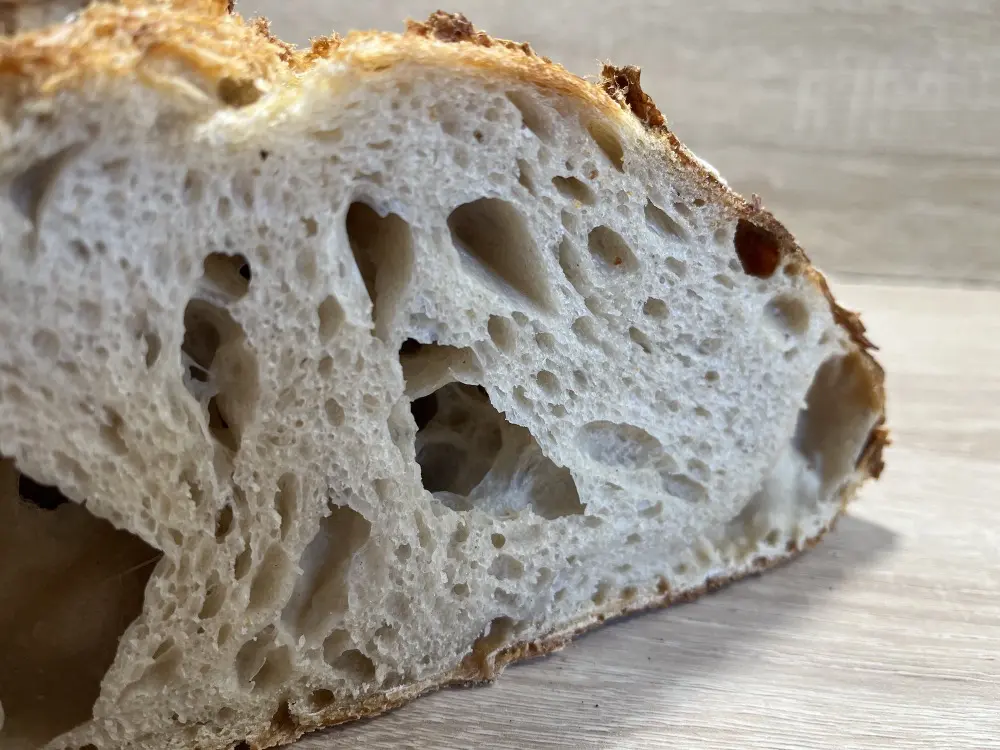
When the water starts to boil, I take the bread out of the proofing basket and put it in the oven, leaving it directly on the stone. Once this is done, I put the preheated saucepan in the oven, next to the bread but leaving some space (the bread will rise). Then I add the boiling water to the hot pot and close the oven. At this moment, an enormous amount of steam begins to be generated, which will remain locked in the oven. Lots of steam. This steam will make the bread a perfect crust but remain elastic during baking, which will allow the bread to rise a lot.
The bread will remain in the oven for 30 minutes under these conditions. After this time the bread should have doubled in size. Now is the time to open the oven carefully as a lot of steam will come out, remove the pan with the water (we no longer need more steam) and leave the bread for 30 more minutes, raising the temperature to 240°C. Now we are going to toast the crust. This will make the bread crispier and darker.

The chilled
After an hour of baking (or sooner if you see that it is toasting too much) you can carefully remove the bread from the oven. Now you have to let it cool, preferably on a wire rack, for about an hour. It is not convenient to open the bread before as it will still be too hot, it will not cut well and the crumb can make a paste that will stick to the knife.
This type of bread is perfect with German (smoked) charcuterie or simply with butter. Olive oil doesn't suit it too well and I prefer to use it with white bread.
Guten Appetit!